Showing posts with label Lindys. Show all posts

Monday, 18 February 2019

Dusty Attic Mood Board Inspiration - February 2019

Welcome to February at Dusty Attic!! Here is some inspiration for the mood board to get that creative Mojo into swing... 
I loved playing around with the chipboard this time as it created a gorgeous Tiara. I complimented it with some Dusty Attic Stencils and papers from AB Studio from the 'In Wonderland' & 'Dreamland' collection... 
Hope you like it!


Here is one of my favourite techniques... I like to prime my chipboard with gesso and then tap it with a flat brush to create peaks and ridges. It gives the colour somewhere to sit and pool creating exciting colour variations. Its best to dry in between layers if you want to use more than one colour.


After priming my page in Clear Gesso I used Dusty Attic stencil in Crosshatch and embossed, then I used some embellishment mousse through the Dusty Attic stencil in Creative Script.


Popped some stamping in the background in organic shapes and textures. I played with using Gesso, yellow & coral colour options before I settled on some walnut spray for colour.
TIP: I use the area that will be covered by my focal point as a little tester. It lets me know how the product will react or if I like the effect.


Here is a close up of all the mixed media elements put together.


Here comes the fun... I fussy cut papers from AB studio and along with flowers from 49 & Market created my collage. I embossed my title in Orange Popsicle from Lindy's. I needed a solid colour with out shimmer to make the page come together. 


I LOVE this chipboard!! Its so versatile as a frame or an edge or in this case a TIARA.. I coloured it with some teal shimmer spray used some glossy accents to add dimension. 


Dusty Attic Pearls and Micro beads on the pendant after also used some Glossy Accents and a little wax to highlight some areas. I finished off with dry brushing with Gesso and some splatters...


Look at those layers... and still the project is quite flat and will fit comfortably in my album. 


 Thanks for looking! Come and check out my blog if you would like to see other projects featuring Dusty Attic Chipboard.


DUSTY ATTIC Chipboards
 

DUSTY ATTIC Stencils


DUSTY ATTIC Embellishments


Monday, 27 August 2018

Art and Soul - August Challenge Inspiration


Happy August.. 
I had to admit Amanda had me on my toes with this one... I put my Big Girl pants on and embraced my 'pink'... Hope you get some inspiration from it. 


Mood Board Challenge Rules

Please use our mood board as inspiration to create an art journal page, a card or a scrapbooking layout. Use the mood board however you want but you must add your own handwriting on your project.

As these challenges are sponsored by Art and Soul Studio please make sure that you use at least one product that is available from the store.

There are 3 x $50 vouchers up for grabs!! One will be awarded for scrapbooking layouts, one for cards and one for mixed media/art journaling.

You can enter an art journal page, a card and a layout but you cannot win all three.

You have until the 11:59pm on the 31 August to enter and then the design team will vote to determine the lucky winners.


Please note that the vouchers can only be won by residents of Australia but if you are from overseas and win the challenge you will be offered a guest design team spot.

Friday, 17 August 2018

How Fragile We Are - Art & Soul Studio

This one is quite personal to me.. We all have so many happy stories we post about but this one is about a difficult time. Recently my back pain was diagnosed as a more serious matter than the arthritis I had been learning to live with. I had been feeling low after so many nights of waking up in pain it was taking a toll on our relationship. So for those of us that live with pain - I know you get it.. 

This piece is a reflection on our relationship and has some personal totems in it that relate to just us... It also looks pretty! 
Today I am showing you a bit of my heart and soul today.
Hope you enjoy! xx Kristy


In this project I pulled out a journal page from my book and stamped with my Visible image stamps - How Fragile. I then sprayed my two favourite Lindy's sprays on the page Moon Shadow Mist Malachite and Starburst Shabby Turbine Teal. I grabbed my TCW Stencil Mini Geometric and used some of the shapes on there to create some texture with Modelling paste. 


I applied some Tissue wrap and washi tape from Tim Holtz to create a base for my focal point.. I included my totems here.. The music, #27 and a reminder that our goal is to me happy together.. I grabbed my Distress crayon in Black soot and rubbed it onto my finger and highlighted the texture on the page. also adding to the vintage look.


Once I was happy with my highlighting I used my TCW Stencil in Chicken Wire to do what I call the caging effect... 


Once I was happy with that I let it dry and added some highlights. I used my Barn Door Distress spray to add some highlights to the shattered glass.. Symbolism for the pain that we had gone through recently and the fragility of a relationship represented by the glass. I also used a stamp that was a cobbled wall to accent the layout to also represent that the strength of a wall is not always represented by the shape of the stones that build it... 


Here are my dragonflies.. another totem, like butterflies but strong! I stamped them with another Visible Image stamp - Dragonflies with my  Tim Holtz stamp press in Staz on - Brown. I used my water brush to wet down the wings and sprinkled onto it some mica powder in an emerald green colour. I love the way you never quite know what you are going to get with them and used minimal blending to take advantage of the effect. I used my Colour Blast Shimmer pen to add some sparkle to the wings. I used some nylon thread to tangle the Dragonflies in as that's how I feel about my husband, we are intertwined. 


Now it was time to create the title. I kept it simple and the quote was enough. I stamped the quote from the How Fragile stamp and puddled a good squirt of Moon Shadow Malachite onto my craft mat and dipped the card into it and dried it. It was too light so I kept reapplying and drying in between to get that amazing puddle effect. With my water brush I applied a watered down coat of Barn Door and then a smudge of Shabby turbine Teal. I didn't want the red to overshadow the How Fragile accent. 


Thanks for looking.. Happy Creating!
Kristy - Abela Artistry
Thanks for looking.. Happy Creating!
Product list
Visible image stamps How Fragile & Dragonflies
Staz on - Timber Brown
Distress Crayon - Black soot
Distress Spray - Barn Door
TCW Stencil Chicken Wire & Mini Geometric
Tim Holtz Tissue - Melange
Water Brush


Wednesday, 15 August 2018

Scrap the boys Cards - August 2018


Well... This one was just awesome fun! Scrap the  boys are at it again... Its Challenge time! 
Love the Geometric theme, love the colours and the whole rustic effect. Again I used some of Seth Apters Dies. He is a master of all things masculine. 

I got some Lindy's sprays in Cattail Copper Brown and Crows Nest Copper Moonshadow to create the rusty shades for the Seth Apter Dies - Robo bars. I used Tibetan Poppy Teal to add the patina to the rust and used a Clear Gesso'd sheet of plain white card as a base.
I had a Kaiser Craft Die for the reo bars and the chip board was from WOW I had in my stash for AGES... 

Here is a close up of the finished effects.


Sunday, 5 August 2018

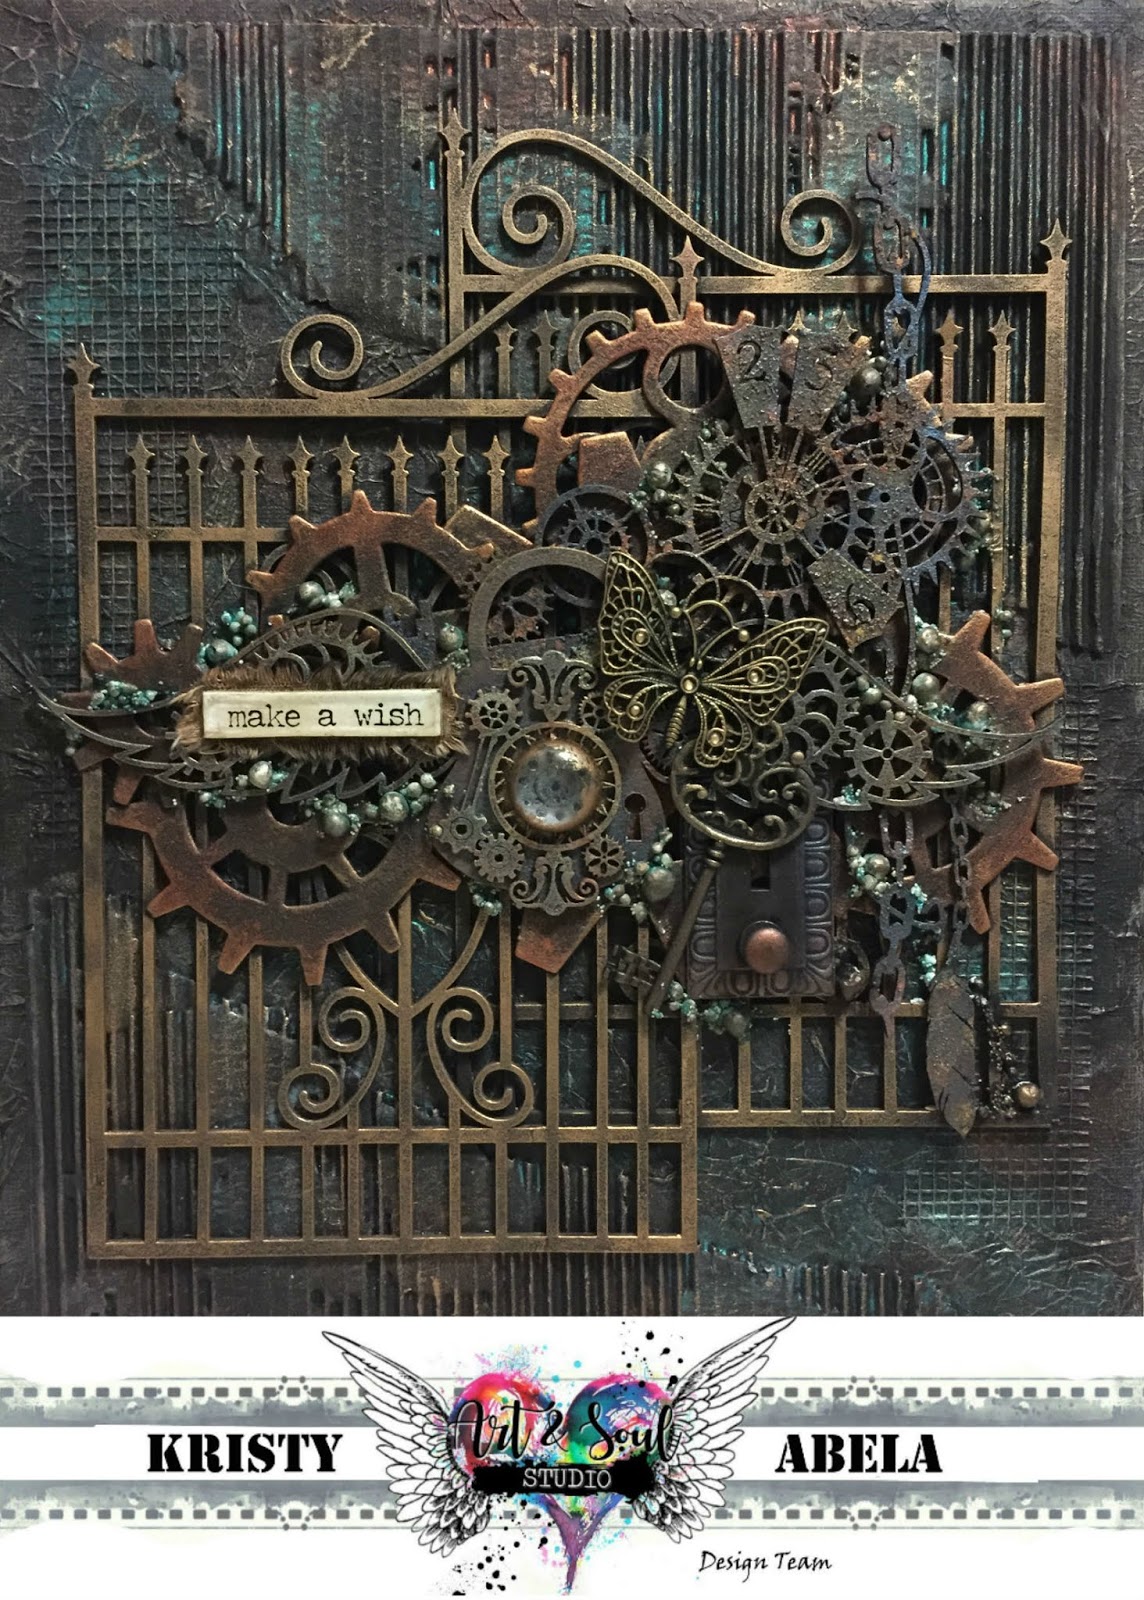
Art and Soul - Make a Wish - Abela Artistry

Hi Everyone.. Welcome to my inspiration post...
I really wanted to follow up on the quick bite I posted last time to show you how you can take those techniques one step further and create a Steampunk masterpiece.. 


In this project I created a black canvas with pieces of Corrugated cardstock and tissue paper using gesso as a base and also as a 'glue'. 
I primed the canvas and put the scrunched up tissue paper on top to create lots of texture. Then I layered my cardboard on top and added some gyprock mesh tape to finish the background. I then arranged my Chipboard to figure out how I wanted the piece to go... Painted it all black and then began.

I sprayed some Lindys on the background and used some wax to colour the gate to make it pop out of the background. Once dry I used some gold paint to drybrush over the surface to bring out the texture.

I gathered the chipboard that would make up the bulk of my background and used some Rust paste to age it into my coppery patina background. Once completely dry I used some wax to add a colour variation on the cogs.


I layered on my chipboard and Metals (also painted black and Waxed for colour) and saved the main focal point to last. I wasn't sure which colour direction I wanted it to head... In the end I chose some darker blues with Opal Magic paint and turquoise and silver wax to tie in the background with the foreground. 


Added some Art stones and popped a Pebble over the center of the padlock. I then used the Lindy's sprays with a brush to colour them.. I didn't want them to be too dark. If you look closely you can see where I did an experiment with a few to see.. Here's your Wheres Wally moment.. Hint: bottom corner..

Thanks for stopping by.. Happy Crafting!!

Product list

Dusty Attic: Ornate Gates - Large 
Scrap FX: Steampunk contraption
Prima/Finnabair Art Ingredients Melange
Lindys Starburst - Tibetan Poppy Teal
Lindys Moon Shadow Mist- Crows Nest
Prima Rust Effect Paste ( On Sale Now)
Art Alchemy Metallic Paint - Steampunk Copper
Art Alchemy Opal Magic Paint - Aqua Rose 

Sunday, 24 June 2018

Art and Soul Studio - June Challenge - Live in the moment


I came across the new release papers for Cocoa Vanilla - Boy Rule!! Wow... so I had to mix it up with the June Challenge at Art and Soul!! Check out my Layout with the June Colours and "Use your handwriting" Rule.


Papers - Cocoa Vanilla
Chipboard - Dusty Attic - WOW - 2Crafty
Sprays and Embossing powders - Lindys

Love to see what you think... Leave me a comment!!