Saturday 25 May 2019

Dusty Attic Mood Board Inspiration - May 2019 - Your the One!


Hey Attic Dwellers! 
I have been busy playing with my Chippies and flourishes and have this gorgeous layout to share with you! I am am bit saddened that the weather has turned. No matter how hot it gets I still prefer it to winter... Brrr!! So check out this inspiration... I'm counting down the days 'til the spring blossoms are again in bloom. 


To start I had a play with my Modelling paste Black! OMG... In LOVE! 
Look at the way it perfectly framed all the chipboard in this layout. Here I marked out a boundary for my focal point and repeated the pattern in the stencil to frame the whole image.


I rarely use purple in my layouts and from what I read among other crafters' - you either love it or hate it! 
Its my favourite colour so perhaps that's why I am scared of it. The inner voice asking, "Will I do it justice?" You can decide!


I really felt that it needed a pop of colour so I tested it on the area under the focal point and BOOM! Look at that separation of colour! 


I used embossing powder to colour my Chipboard, I wanted the glossy look of sunlight reflecting off the flowers. I didn't have any dark flowers or embellishments so I ended up dying my fabric and flowers to match my layout. To give it a touch of femininity without colour i used my Dusty Pearl Flourish Bling... perfect!


Found these awesome paper straws! Check out your local IGA in Sydney or Melbourne... Perfect embellishment - (and a plug for hubby who distributes the product..)


I used some archival quality ink in blue and black to stamp in the background.


I finished it off with a Cuts 2 luv Flair... 
I hope you enjoyed my creative processes... 
Thanks for looking!!

Dusty Attic Products used. 


Thursday 23 May 2019

RHHS Embrace the Journey - Dusty Attic May Inspiration

Welcome back to my blog... 
I did this project as a photo challenge....
 I loved every photo in this set and none of them were really stand outs! So I used them all to create a filmstrip of images to show how much fun we had the morning we sent Aksel off to High School!!


Using White gesso to partially prime my cardstock I applied Distress Spray to the surface I wanted the cardstock to both absorb and resist the colour. Using some chalk paint to darken the top and diluted it to create shadow in the gaps of the Chipboard. 


I love the look of this - Stone Washed Denim!! #childofthe80's


For texture I used Rust pastes to age the piece. 


I gently rubbed the oxide pads over Dusty Attic Corrugated Cardstock in our school colours (yes, poor boy... I went to the same school) and framed the images with a touch of white gesso in lieu of a matt.


I created a background of plasterers tape, Stamping and Stenciling to layer my chipboard onto. I used some metallic paint from and painted the wood veneers Blue and the Industrial Globes in yellow. 


Here is a close up with the prills and paint splatters.


These are the images from the opposite page.


Without making it too obvious... I worked the date into the embellishments!
Thanks for looking!


Dusty Attic Products used 


Other Products Used

Paper Artsy Chalk Acrylic - Pea Coat
Distress Spray - Denim
TCW Remnant stencil - Ancient Wheel
TCW texture paste- Grecian Gold
Darkroom Door Stamp - Crosshatch
Paper -Studio Light Industrial 3.0
Studio Light Grunge Stamp Collection #341
Tsukineko Archival pigment stamp pad - Blue
Prima Texture paste - Rust
Plasterers tape
Wooden Veneer letters
Tim Holtz Chipwords
Black, White & Clear gesso
Prills
Art Alchemy acrylic - Midnight Sky 
Glossy Accents
Prima Cabochons
Sisal


Thursday 16 May 2019

This Fills my Heart - Dusty Attic Mood Board Inspiration - April 2019


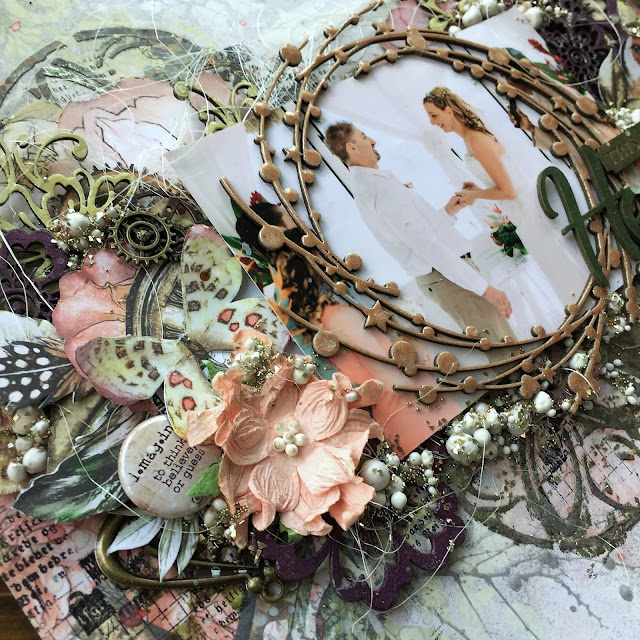
Well I must say that this moodboard had me challenged! While I loved the colours they didnt fit with the image... So when I rummaged through my stash I either had the perfect paper... Or the perfect Pic... Not both!! In the end I think that it came off ok.. Thanks to Dusty Attic for really pushing me out of my comfort zone this time. 


So with any great project I began with colouring my embellishments. I really had to work out which ones deserved prominence in this layout. I added extra dimension to the pale colour I used by adding a layer of Dusty Attic Crackle Varnish. 


I primed my background with some Clear Gesso and used a TCW Stencil to apply some Tacky when Dry medium to. I wanted to add some actual sparkle to the Fab AB Studio background and used Guilding flakes... 


Once I brushed off all my flake I used a Dusty Attic Stencil and a sponge to push it into the background a little. I didn't want the gold to overpower the project.. 


Once the paint was dry I added some colour with Distress inkpad and some sprays. I knew the colour would re-activate and this was the effect I was after. I wanted a milky background with a hint of coral and shimmer... How did I go?


I used a metallic paint to colour my title and again... a touch of sparkle, this time with wax. I did a plain emboss of the Cosmic Swirl. It was too pretty to alter too much so I kept ot simple... It matched my Junior Bridesmaids anyway!!


Here you can see the LEAP! Yep, bold and metallic... but purple! 
Ironically it is my favourite colour but I just cannot create with it!


Close ups of the elements in the paper packs from A.B. Studio.


Dusty Attic Chipboard and Mixed Media Supplies below.


Damask Stencil
Dusty in Colour Clear Crackle Varnish
Cosmic Swirl
Fantasy Flowers
Corner Flourish
Quote "This Fills my Heart"

Other products
Paper by A. B. Studios - Dreamland Collection, 'Amazing Landscapes'
Tacky When Dry Medium - TCW Workshop
Button Remnant - TCW Workshop
Distress Oxides - Tattered Rose / Antique linen / Victorian Velvet
Distress Ink - Abandoned Coral
Lindys Spray - Creme Brulee Cream
Lindys Emboss - Byzantine Bronze
Verdi Gris - Guilding flakes
Arts Stones by Finnabair
Art Alchemy paints - Plum Preserves & Golden Moss
Micro Beads
Glass Glitter
Assorted Flowers
Lace Elements
Sisal
Metal Embellishments