Wednesday 23 December 2020

Moonlit Offering - December inspiration for Dusty Attic

Welcome to my final post for 2020.... however it wont be my last post for Dusty Attic. While everyone enjoys a quiet break ill be busy in my little studio creating masterpieces for 2021! Bring it on, I say!! I hope that you have enjoyed my creations as much as I have. With that in mind I have made a little offering for you all... that a little piece of heaven fills your night sky with love, light and healing in 2021. 

I have wanted to do something special with my mystic boho obsession and Jen and Nuneka came to the rescue with these fantastic new designs. I have been holding onto some Stamperia Cosmos papers for just this occasion... I attached an image of the moon to a canvas panel of 8 x 8". I then added a generous amount of clear crackle paste.

 
 I painted all the chipboard with TWO coats of white gesso. I was planing to use an oil paint indigo wash over the whole page so I wanted to protect my chipboard from the wet medium. I filled some of the moon with seed beads and filled in the edges with art stones. I painted some of the focal points with a gold acrylic paint. This has a high resist finish and I knew that it wouldn't absorb the wash.
 
 
I used modelling paste to create some texture and create hair and a dress for my little fairy. Once I applied the wash I used a selection of waxes to add highlights. I love the way that the moon in the background now looks like the earth! 
 
 
I used some Metallic paint to colour her dress and I put some metallic paste on the bottom of the cabochons to create the ethereal shimmer underneath.
 

Here in the close up you can see that the little moon in her hand was actually the cut out piece from the big moon... I kinda thought it was symbolic to use this as an element in the "offering".

 
Here is my final closeup... I hope you like this kind of Mixed Media work. This collage on canvas really sings to my soul and is my absolute joy!
 
 
  Have an amazing Christmas everyone! Thanks for looking and catch you on the flipside...
 
Abela Artistry

 Chipboard used

Gears #1 by Nuneka

Moons #2 by Nuneka

Garden Fairy

Industrial Wings #1

Gear Corners #1

Mini Titles #1 - Love

Friday 18 December 2020

This makes my SOUL happy - December Moodboard for Dusty Attic

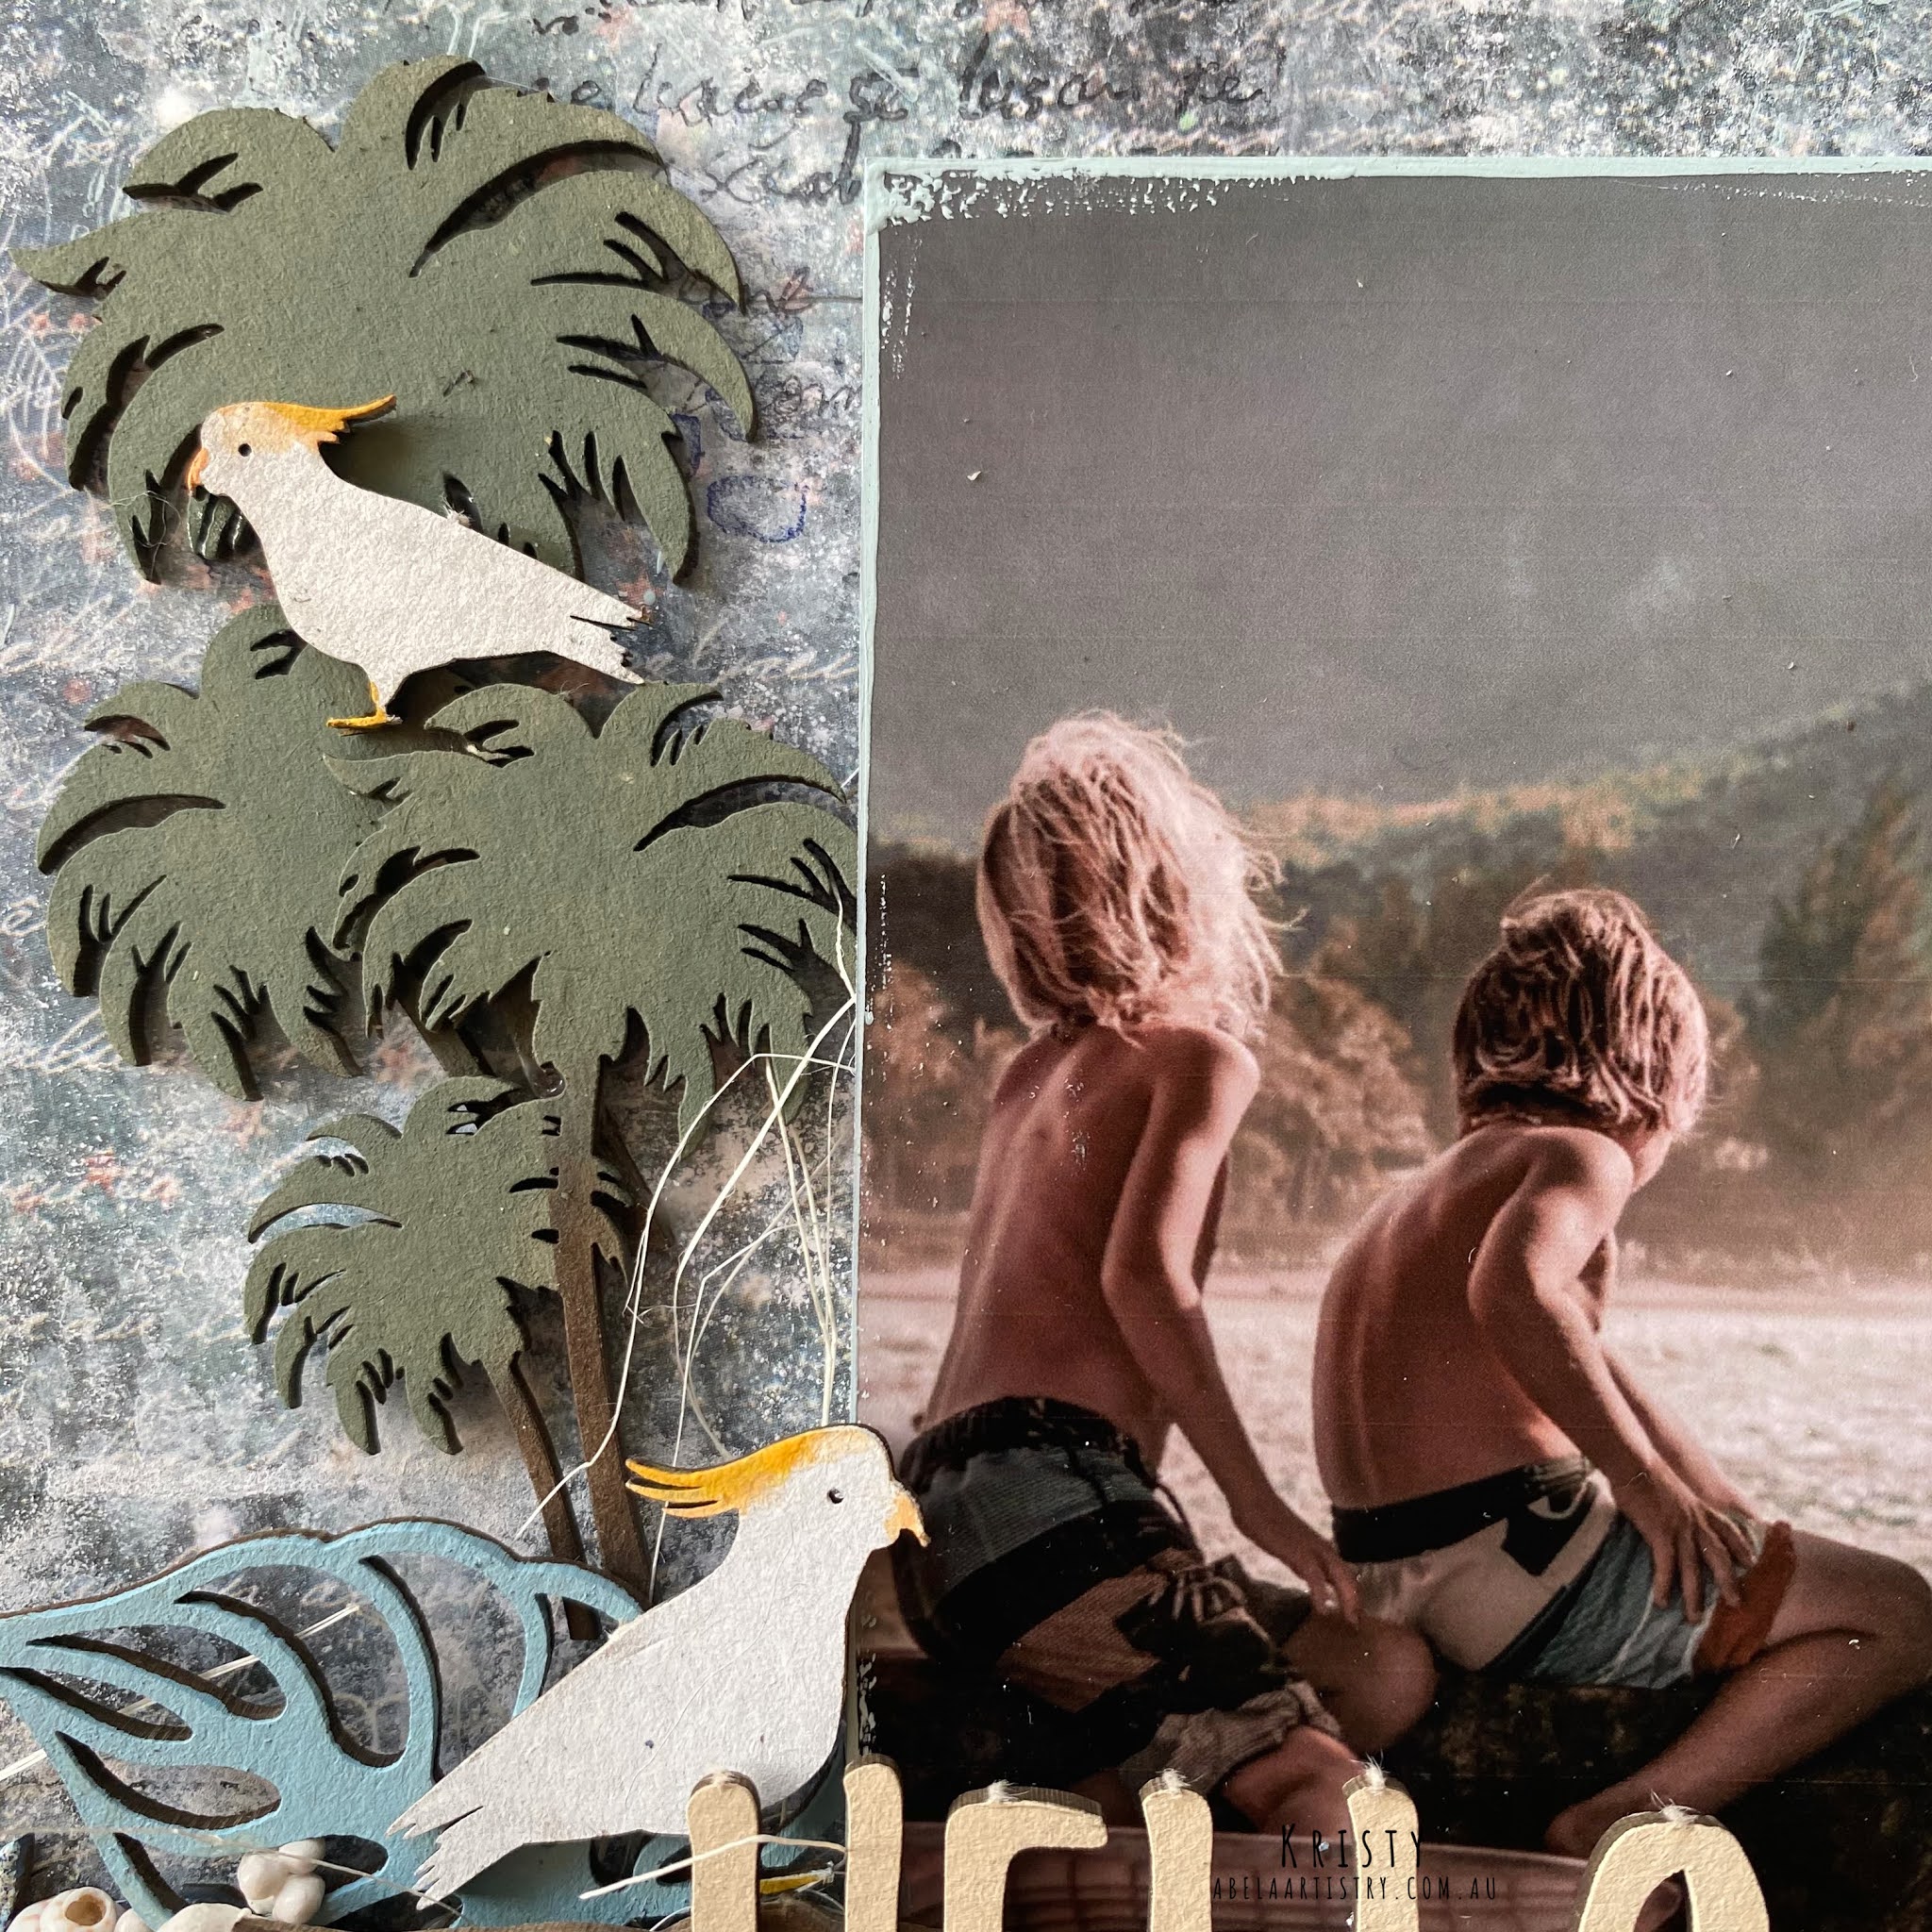
Welcome to my last Mood board inspirations for 2020. It was definitely a year to reflect on the things that bring joy and these guys are my EVERYTHING. This was at my birthday dinner a few years back... coz my birthday this year was in the middle of Covid! 

So I thought to wrap up the year I'd reflect on the simple things. Hope you guys are all counting your blessings and looking forward to 2021!

Here is a run through of the process. Forgive the shadows... Here I thought that the natural light would look lovely... Doh!!

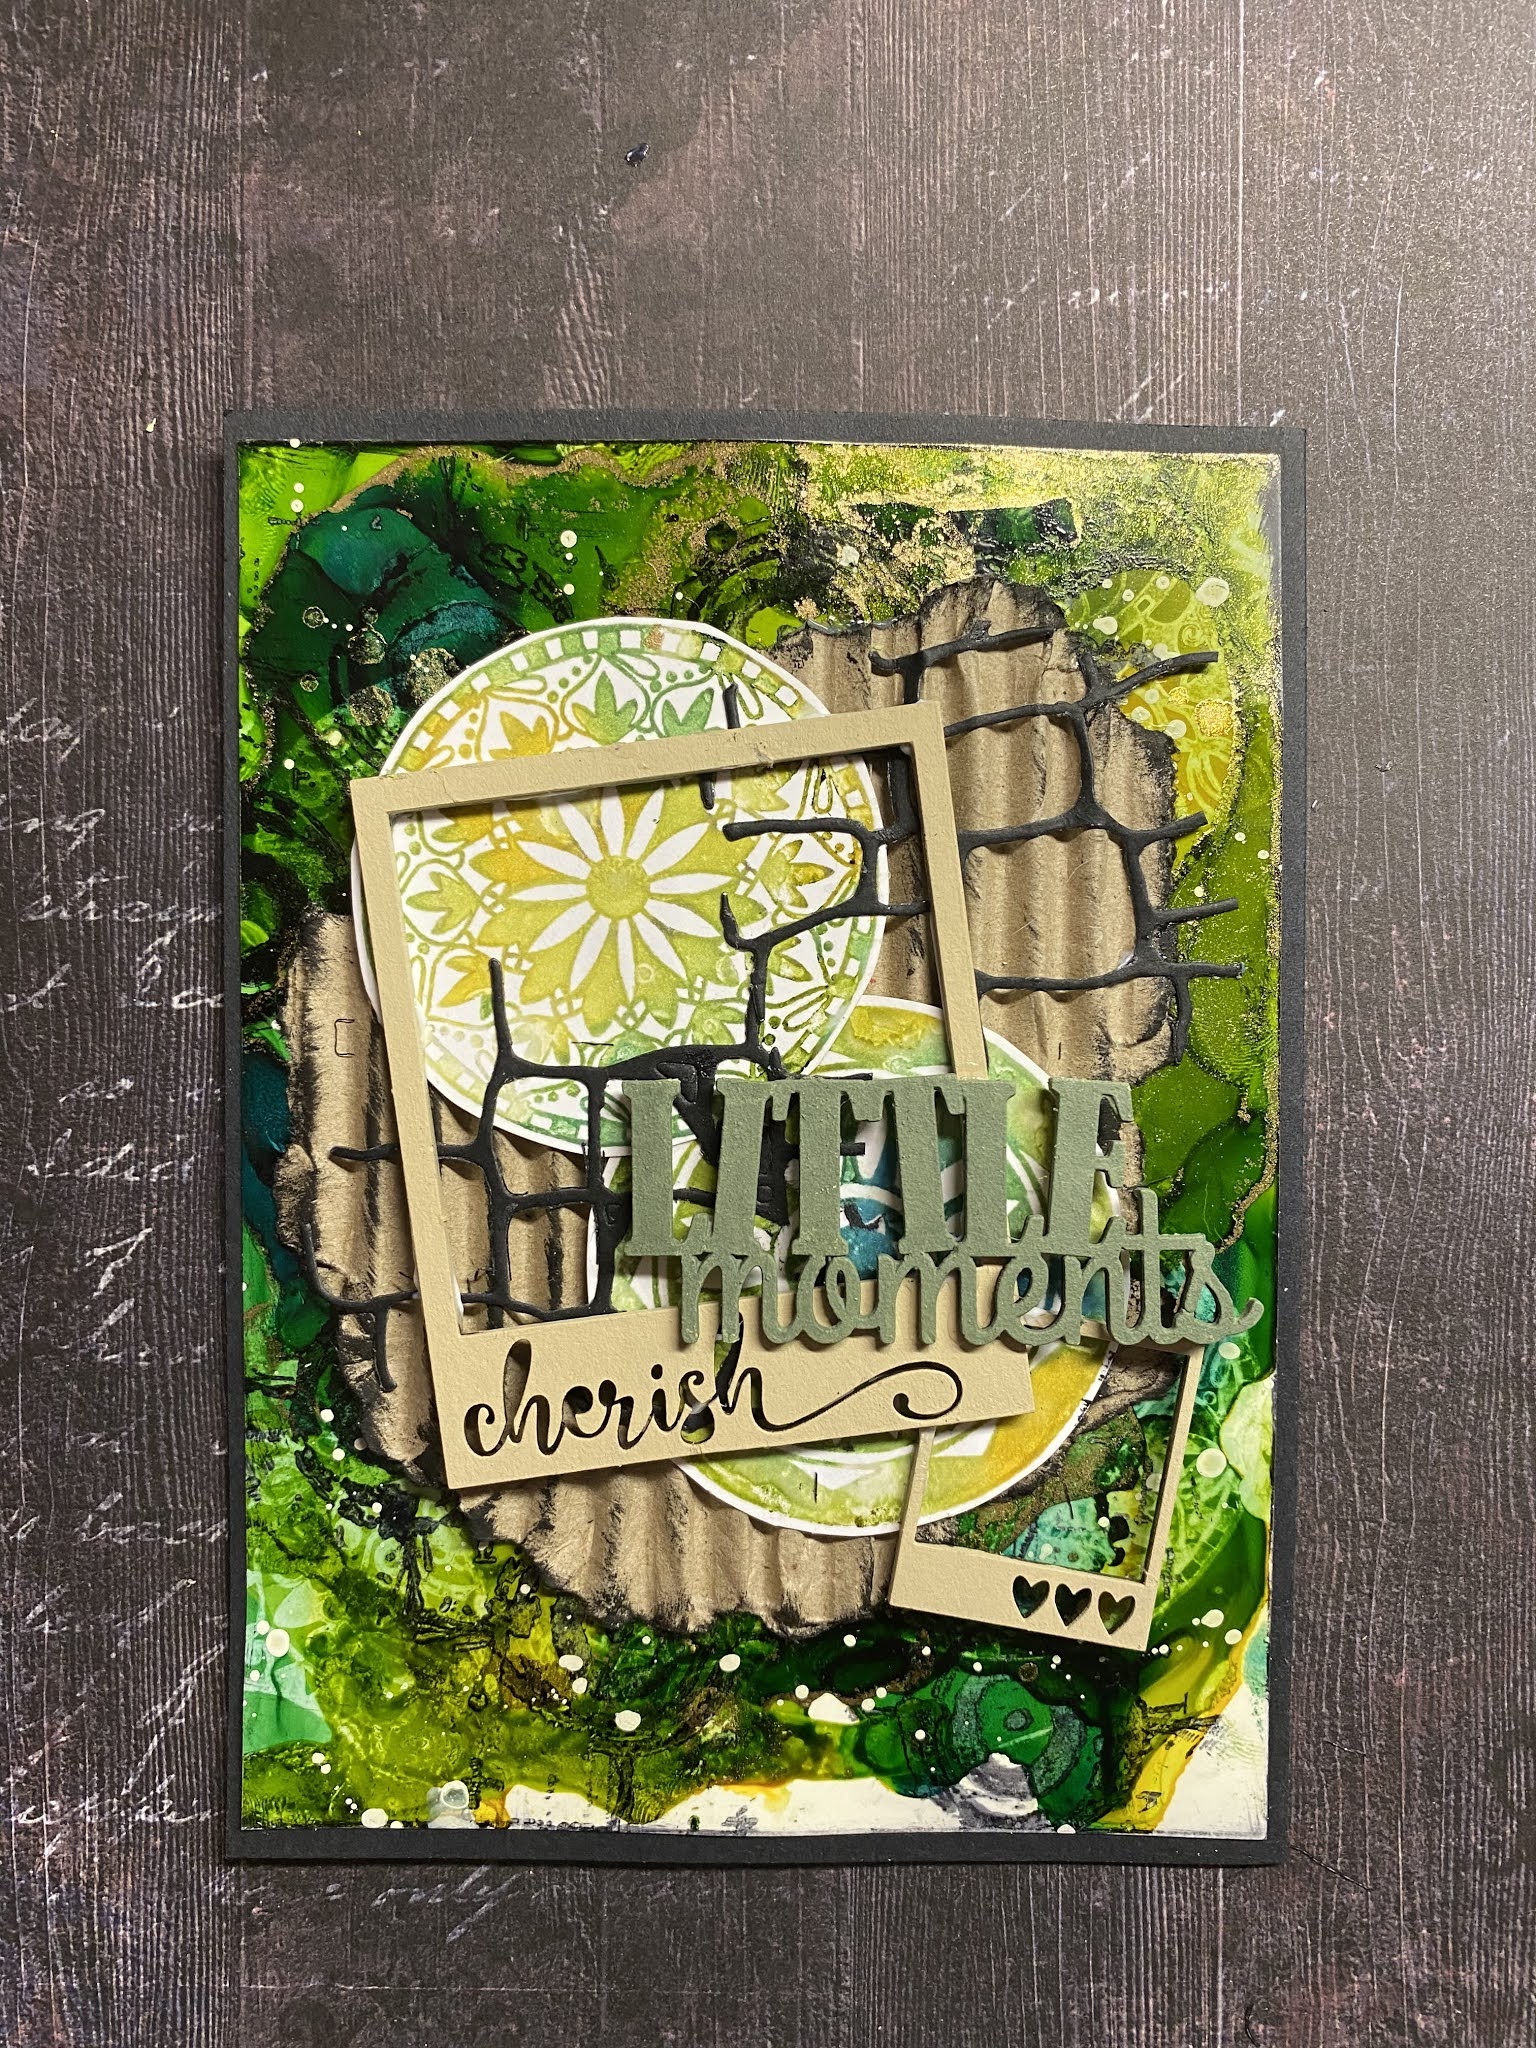
I used paper from 13@rts collection Summer Days, the wood grain was a little crazy so I used some white gesso to fade it out. I then used my brayer with some chalk paint to add a little colour back in. The cross hatching you can see is done with a store card. Its a fav technique of mine and it just adds a little framework to position the focal point within. Once I knew where my frame was going to be I used some mesh tape on the page this was also a good visual for where I wanted to frame my photo with my chipboard.


I prepared all the chipboard with a coat of white gesso. For this project I wanted to play with my embossing powders. I used my embossing dauber and randomly dabbed at the Broken Bits Wire. I then used Cafe Au Lait from Lindy's to sprinkle on top. I didn't want a full coverage to give it a bit of a garden gate kinda feel. You can see this in the close up below. 


For the collage I wanted to add something pointy under it to give it the illusion of a bouquet. I chose the feathers to do this and the little bows as an area of interest. I didn't want to have green leaves... so I thought I would try out this embossing powder from WOW it has three colours in one and is called Sea Salt - I hated it... It blended into the background and I couldn't see my feathers anymore. So I grabbed another WOW embossing powders called Sea Turtle. It blended really well with the blue giving it just a bit of lift for colour variation. I must say my WOW moment was when I heated the second layer of powder and watched the first coat blend like lava with the second coat without any burn!

 
I used a matt red for my bows like the beautiful chest on the red robin in the picture. Once I had stuck down my collage pieces I used some Distress crayon to rub over the textured areas. I like the way you can leave clumps of colour and also blend it with your fingertip.

 
To finish off I added some micro beads around the butterflies and flowers and then added a sprinkle of glass glitter.

If you ever want some tips n hints, you can reach out to me. I love teaching and sharing my love of scrapping. Anyhoo...  Happy Scrapping over Christmas and I look forward to seeing all your creations in our Facebook Group Dusty FANAttics!

Abela Artistry


Chipboard used

Twine Bows #3

Title - This makes my soul happy

Broken bits#5 - Wire

Feathers 

Tropical Foliage #10

Tuesday 15 December 2020

Dreamer - Dusty Attic Moodboard inspiration November 2020


 Hi Dusty FanAttic's 
Where has this year gone! Its time for me to start thinking about gifts for Christmas. I really struggle to find cost effective and unique gifts so I often make my own. I used this mood board to put together a bouquet canvas for one of the lucky ladies in my life. I can't tell you who, but I will let you know if she liked it come New Year.


 I used some techniques I learned from doing an online course with Laly Millie. She reminded me that I hadn't use my canvases as much as I used to. So I pulled one out and got busy. 


Thanks for looking and I hope today is as beautiful as a Bouquet!

Monday 23 November 2020

Timeless Journey - Dusty Attic inspiration - November 2020


Who doesn't have a picture of that typical 'Dad' moment? What joy our other halves bring! I figured it was time to get some of those off the computer and in the album so the family can see. This was on our way to a NYE Celebration in 2013 so we were both in good spirits and looking to be a little playful... Have a look below to see how I pulled it all together.


I primed the card stock with clear gesso, this one is from 13@rts. I always do this when working with wet medium. Its a fail safe in case I go overboard. If I have a heavy handed moment it can wipe straight off. Yeah for baby wipes!! In order to have the Lindy's spray grip to the page I added some stenciling with modelling paste. This catches the liquid when I am moving the page around to create drips. It also helps to catch the shimmer pigment and gives it a great highlight.


  I added some crayons to highlight areas in the background. I have water soluble crayons in many different brands. To be honest, they are all similar in colour but so different in practice. Without naming names, some are softer and easy to blend with water, others are harder and work more like pencils and leave shadows. In the background here I used Gelato's


I spent some time fussy cutting the flowers off another sheet of 13@rts cardstock and used some Prima Crayons to colour in the flowers. I love these because they are super soluble and totally disappear when activated without leaving lines. Once dry I went back in with the same colour crayon and added some contrast.

I created matts for my photos... I haven't done this for a while but I really enjoy torn edges and staining them with ink. I think it gives a real randomness to the distressed edge and I find inking them with an ink pad leaves too much white. I used the same spray that I used in the background to tie the foreground.

I decided to go with using black chipboard on this layout. I used a pallet knife to spread the paint on the skeleton clock. It applies patchy and adds to the distressed look. Once I ran out of paint I could pick up on my brush I picked up my mat and rubbed it straight onto the clock to use up the remainder.


I used some Prima waxes to highlight the chipboard so it wasn't flat black. Everyone loves a bit of shimmer right?

I used a dry brush to add some contrast to the arrows as they seemed to get lost on the page.


Thanks for looking, I hope you got inspired to try something new! 

Abela Artistry

Chipboard used.  

Arrow borders #3

Skeleton Clock Faces

Roman Numerals

Blueprint Word pack

Mini words #3 

Key to my heart 

Nuts & Bolts 

Cog cluster

Mini Cogs


Friday 23 October 2020

Dusty Attic inspiration October 2020 - Alcohol ink cards

 Hey there Fanattics!

Nothing beats the excitement of getting new mediums and testing their limits... but what then? This month I wanted to show you how to use up some of those "experiments" with your products and turn them into easy and interesting cards with our favourite chip boards. As an avid art journaller... yep,  pages and pages of play, some great and some I would rather forget (those become collage papers...) but that's another story! 


I created these backgrounds out of Alcohol ink and a Lift Off stamp pad. The aim was to use the stamping as coordinating embellishments. I find Alcohol ink an unforgiving medium to work with but when you get it right the effects are well worth the effort. Dusty Attics corrugated card stock is a perfect matt for me. It has texture and only needs a little highlighting with a stamp pad to create some amazing effects.  

 
I didn't want to cover up the stamped images and the Polaroid Frame along with the baby polaroid was perfect to draw the eye and the frame quote was a perfect compliment to the Mini Caption. Now we Cherish little memories...
 

I had added some splatters to the Alcohol ink background and added some to the foreground as well. This helps to integrate all the elements into one as well as to reinforce the "unisex" possibilities of the card.
 
 Here I repeated the process. I used some texture & script stamping on the background and coloured my chipboard to match this one. I coloured my chipboard to contrast in the previous card.


Here is the final product! Check out the chip board I used below.


Chipboard


 Dusty Attic Chipboard

 Polaroid frame set #1

Corrugated Cardstock

Mini Captions #6

Squiggly frame #5

Mini Brackets


Hello Summer

 Hi Dusty Attic lovers.... 

 
I was lucky enough to live beside the beach for six years and one of the things I noticed was the grommets hanging down by the river rather than in the surf late in the day. On the East Coast the beach often gets 'blown out' in the afternoon and the surf can be hit n miss. This pic reminded me of the carefree days of evening walks with my boys along th V-wall who thought everything that came out of the ocean was a treasure; and for their Mum, the Cancerian Crab, who believes that the ocean is far more magical at night than the day.


To create this bit of magic I added a spattering of stars in Gold Paste and used a brayer to calm the middle of the page. I didn't want the darkness to dominate . See the pencil mark, that was to act as a guide for my image.

 
I added some script stamping to put back into the background what the gesso had taken out and used a texture stamp in a light blue to add some interest.

 
I coloured my chipboard with chalk paint and added some embossing powder to my nets in places to add a weathered look. For my Gecko's I painted them with a thick coat of paint and then used my heat tool to make them bubble and let them cool. This adds a great textured look, perfect for reptiles. 
 
 
Once I was happy I put all my elements together. Have a look at these close ups for the full effect. 


Thanks for stopping by to have a look and I hope you get to find a little moonlight magic at the beach.


Here is a list with links to the chipboard I used on the layout to help inspire you. 
Till next time... Hugz from me!