Showing posts with label Mixed Media Collage. Show all posts

Wednesday, 5 December 2018

Angel Dreaming - Art and Soul Studio

Hi there Soul Sisters...
My turn up on the blog today to share with you some inspiration.  Mixed Media canvas for you playing with some metallic paints and Chipboard. I have been eyeing off these Dusty Attic wings for a while now and wanted to showcase them in a project. 


Here is my process.. 
I started out adhering the chipboard and stones on the canvas. I also used some lace for extra texture in the background and painted it all in white gesso.


I began adding colour to the piece by layering in concentric circles moving inwards. I went from lightest to darkest and being more frugal in my applications as the deepened. 


I made sure to dilute the colour with water on the brush and applied it directly. I then sprayed a mist of water to get it too run into the deeper layers. I avoided adding colour to the wings as I wanted to make them a focal point. 


I made sure to dilute the colour with water on the brush and applied it directly. I then sprayed a mist of water to get it too run into the deeper layers. 


Once done I dry brushed some white gesso over the texture to push the colour deeper into the background.


I added some crackle paste... and a little rub of wax onto my stones.


Coloured some Cheesecloth. 


Popped my focal point on top of the cheesecloth and added some string in a halo. 


Used some Glass Glitter, Prills and Beads on my flowers. I wasn't really happy with the intensity of the embossing powder so I muted the colour with some wax. 


And a little bit of black archival ink with a blending tool over the textures.. and a bit of a dry brush with some gold paint over the chipboard. Some art stones to finish off my focal point. Here's a close up of the texture with the fabric.. Thanks for looking. 


Abela Artistry

Product list:
Lindys Stamp Gang - Bodacious Blush
Art Stones
Wax
Flowers 49 & Market - Potpourri Cerise and Hazelnut
Lace 
Cheesecloth

Tuesday, 25 September 2018

Wonder - Colour Blast Australia

Hi there... Welcome to my next inspiration.. I am a dab hand at using black.. One of the many reasons that I LOVE Colour Blast products.. 
So much Shimmer and Shine!
I wanted to have a play with the Colour Paste and their resist effect alongside the Colour Mica Powders. I wanted to create backgrounds for dry brushing effects.


I primed a 5" x 7" Canvas with Colour Blast Black Heavy Gesso and used Colour Paste in Deep Water to create these stunning wings through a stencil.


I grabbed some trinkets, chipboard and art stones from my stash and created a collage and painted it all black too. I have a happy box and just rummaged through to find some elements that had the same theme. 


I mixed some Colour Mica Powder (Cool Mint, Polar and Olive Grove) with some gel medium. The Colour Mica Powders are pigment only so if you want them to stick you need to add them to a medium.  I didn't want to dilute the colour so I used the gel medium. I then added a spritz of water to make it fluid consistency.


I dabbed it on haphazardly and then gave it another spritz of water to let it to sink deep into the cracks. Using a paper towel I dabbed off the excess. The white is the water reacting with gel medium, don't worry.. It dries clear..


I repeated the process with all three colours, drying in between. Using my damp paper towel I dabbed over the project to add colour to the rest of the canvas as well. Keep playing until you are satisfied.  
Once this was dry I used some Colour Blast White Heavy Gesso to dry brush the whole project to lift the contours out of the collage. 


I mixed up some colour out of my Colour Shimmer pot in Singing the Blues and Bling. I used just enough water to activate the pigment and dry brushed them onto the cherub and the butterfly.


Check out the subtle shimmery effect the puddles have left. The Deep Water Colour Paste has a total resist effect and has not lost any of its shine during the process.


Here are some close ups!!


To finish off the page I used Colour Mica Powder in Leather to a title I had in my stash and were done..  


Thanks for looking and if you like to play with the Black Heavy Gesso and Colour Mica Powders be sure to upload your take in the Colour Blast Creative Corner on Facebook
Ciao for now... Kristy. 


Sunday, 5 August 2018

Art and Soul - Make a Wish - Abela Artistry

Hi Everyone.. Welcome to my inspiration post...
I really wanted to follow up on the quick bite I posted last time to show you how you can take those techniques one step further and create a Steampunk masterpiece.. 


In this project I created a black canvas with pieces of Corrugated cardstock and tissue paper using gesso as a base and also as a 'glue'. 
I primed the canvas and put the scrunched up tissue paper on top to create lots of texture. Then I layered my cardboard on top and added some gyprock mesh tape to finish the background. I then arranged my Chipboard to figure out how I wanted the piece to go... Painted it all black and then began.

I sprayed some Lindys on the background and used some wax to colour the gate to make it pop out of the background. Once dry I used some gold paint to drybrush over the surface to bring out the texture.

I gathered the chipboard that would make up the bulk of my background and used some Rust paste to age it into my coppery patina background. Once completely dry I used some wax to add a colour variation on the cogs.


I layered on my chipboard and Metals (also painted black and Waxed for colour) and saved the main focal point to last. I wasn't sure which colour direction I wanted it to head... In the end I chose some darker blues with Opal Magic paint and turquoise and silver wax to tie in the background with the foreground. 


Added some Art stones and popped a Pebble over the center of the padlock. I then used the Lindy's sprays with a brush to colour them.. I didn't want them to be too dark. If you look closely you can see where I did an experiment with a few to see.. Here's your Wheres Wally moment.. Hint: bottom corner..

Thanks for stopping by.. Happy Crafting!!

Product list

Dusty Attic: Ornate Gates - Large 
Scrap FX: Steampunk contraption
Prima/Finnabair Art Ingredients Melange
Lindys Starburst - Tibetan Poppy Teal
Lindys Moon Shadow Mist- Crows Nest
Prima Rust Effect Paste ( On Sale Now)
Art Alchemy Metallic Paint - Steampunk Copper
Art Alchemy Opal Magic Paint - Aqua Rose 

Sunday, 29 July 2018

Art and Soul Studio - Mini Gift Frames - Abela Artistry

Sharing with you today my favourite craft.. Black Gesso
I am am real sucker for texture and all ways to create it. These frames make a quick gift and because it holds loads of interest your family and friends will be enchanted. I often give them instead of cards.  
Pop over to the blog Art and Soul Studio


 I use frames that I pick up cheaply and black gesso them and dry brush on some white gesso to prepare the surface. I collect a few embellishments from a tray I have off to the side with prior project.. 'not quite right's' and pop them into the frame. Art and Soul have some great  Dusty Attic Steampunk Heart Chipboard Love potions or Baubles to recreate this project.
 I embossed a piece of Cardboard and primed it in black gesso too. I prepare my pieces and then the fun begins.. 
I use Art Alchemy wax Fire Ruby and Emerald Green metallic paints to highlight my layers and build up as I go adding other dimensions in the process with some Prima Art Stones


 I paint the top layer black and finish off with a rub of Prima Waxes

 I fit it to the frame and add the final embellishments and blend the frames in.


In this one I replicated the same process using a monochrome pallet and used Prima Art Alchemy Paints in purple and pink tones. 


 I am particularly impressed with the away the Opal Magics work. I used Violet Gold and Blackberry on this one and it gave me an amazing gold to offset the Vintage Rose.  

To finish off I added some Lindy's Open Arms Amethyst spray to the Mini Art Stones and left it to dry overnight. Sadly you cant use a heat tool to speed up the process unless you like it blown away.. I did try though.. Wink..

Make sure you pop on over to Soul Sisters and join in on the Challenge this months Mood Board Challenge. 

The Moodboard Challenge Rules are easy,  use our mood board as inspiration to create an art journal page, a card or a scrapbooking layout. 
Use the mood board however you want but you must add a playing card and as these challenges are sponsored by Art and Soul Studio
please make sure that you use at least one product that is available from the store. 
You can enter an art journal page, a card and a layout but you cannot win all three.You have until the 11:59pm on the 31 July to enter and then the design team will vote to determine the lucky winners. Please note that the vouchers can only be won by residents of Australia
 but if you are from overseas and win the challenge you will be offered a guest design team spot.


Friday, 6 January 2017

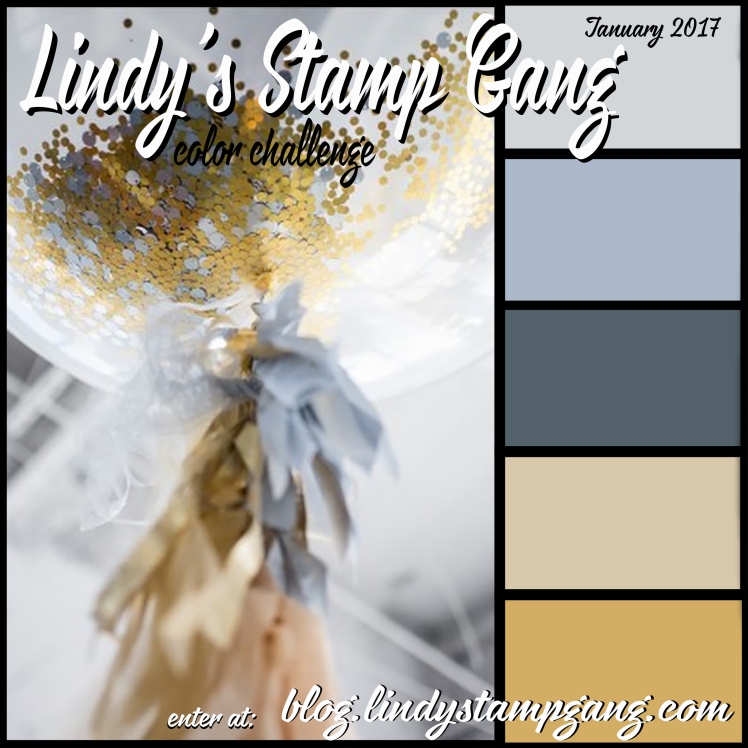
Lindy's Stamp Gang January 2017 Colour Challenge

Welcome to you all... by Kabela

Friday 6th January 2017

https://blog.lindystampgang.com/2017/01/01/january-2017-color-challenge/


Here's my contribution.

That colour pallet inspired "Sunshine after the rain" for me.

My son had a stormy year last year and has started to believe in himself so much more. He's now a ray of sunshine rather than doom and gloom. I took this photo of him sitting on a large rock at the beach late last year and here I can see a calm in him that is just pure gold.

I don't know what made me take that picture in black and white considering it was a perfect blue sky day. Luckily I did... it fit the mood board challenge and I believe...  created a little bit of divine synergy for us both. Here's my first blog and contribution to any challenge anywhere, ever!!
Its my time to .... BELIEVE!


I wrapped the canvas in tissue paper to create a full layer of texture to base my other layers on. It worked amazingly for picking up the pigments in the Lindy's sprays and in the end I didn't want to cover them with texture paste. I highlighted the ridges with white gesso to emphasise the depths and Art Alchemy Steampunk Copper to highlight the peaks.


I have a rather organic feel when I create and used elements found in nature such as the honeycomb and card stock to ground the dreams like qualities in the picture. I used paint splatters to add to the whimsical mystical qualities of the moment I captured.


Some closer looks at the collage. 


I still think that the fluorescent light captures the metallic elements better than the ceiling lights but the ceiling gives the canvas much truer colour.


Product list.

Steampunk Sepia
Gag me with a spoon grey