Hi there, this is my last post for 2018. I had prepared this one early however nothing goes to plan this time of year... I guess that's why its called the Silly Season...
This was of me and my boys when we were on holidays earlier this year at Nambucca Heads.. Just some shenanigans on the V Wall. I still cant believe how much they have grown.. They were once babies riding trikes up and down this strip..
It truly is my happy place.
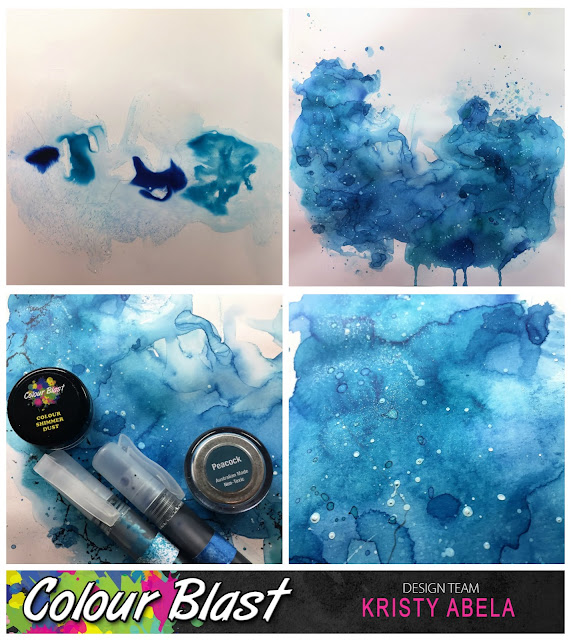
I started out with a piece of glossy cardstock. I love using this kind as it gives a resist to the water colour without changing the properties of it like gesso can. I liberally put some water on the page with a paintbrush. I then sprayed some Colour Shimmer Dust in Cobalt and Peacock from my Home-made misters.. I dried in between layers so I could get the pooling effect to look like water. I splattered some extra colour with the still wet brush and also with my Colour Blast Gesso in white.. It was patiently waiting to be used on my chipboard.
Once that was dried I added some stamping to further enhance the water effect using bubbles and a crackle texture stamp. to finish the background I added some shimmery transparent bubbles with my Colour Paste in Snow.
Check out the sparkle and layers.. I almost felt like I was looking into a stream.
Time to work on my embellishments. I used a sponge to apply my Colour Blast Gesso to the chipboard. I deliberately left peaks on there as I wanted to create some texture. Using my Colour Artist Inks in Barley, Walnut and Rust. I put down on the mat puddles of each and using tweezers dipped them in and dried in between. the colour will reactivate every time so you need to manipulate it to suit. I wanted to highlight the ridges so I used my Colour Shimmer Pot in Bling to touch on a few areas on the shells, I rubbed some onto my finger tip and left it tacky and almost dry and lightly rubbed it onto the stick. I wanted to give it the same effect as what I would get using wax.
I repeated the same process with the Seagulls and added a little bit of Leather from my Colour Shimmer Pot.
You can see the definition below.
I love that it looked so natural in the end.
To finish off my photos I tried to define them by running the edges into some of the Colour Shimmer Dust puddles in Peacock and Cobalt. I didn't like the straight edge it was giving me and I didn't want to get ink on my pictures. I grabbed an eye dropper and created a messy edge. I used Peacock first and then Cobalt, but still wasn't happy with the definition. I then used some Midnight to darken the edge - I was much lighter handed this time round because I didn't want to lose my blues.
Once done, I ran some wire across my page and threaded some fish charms I
had. Layered some textured die cuts and some cheesecloth to create a
net. I added some Art stones in Mini and Regular with some beads to some
gel medium and dragged them across the page.
Thanks for looking and don't forget to tag me if you found some inspiration here on the Colour Blast Creative Corner in Facebook.
 |
| Abela Artistry |


