Monday, 23 November 2020

Timeless Journey - Dusty Attic inspiration - November 2020


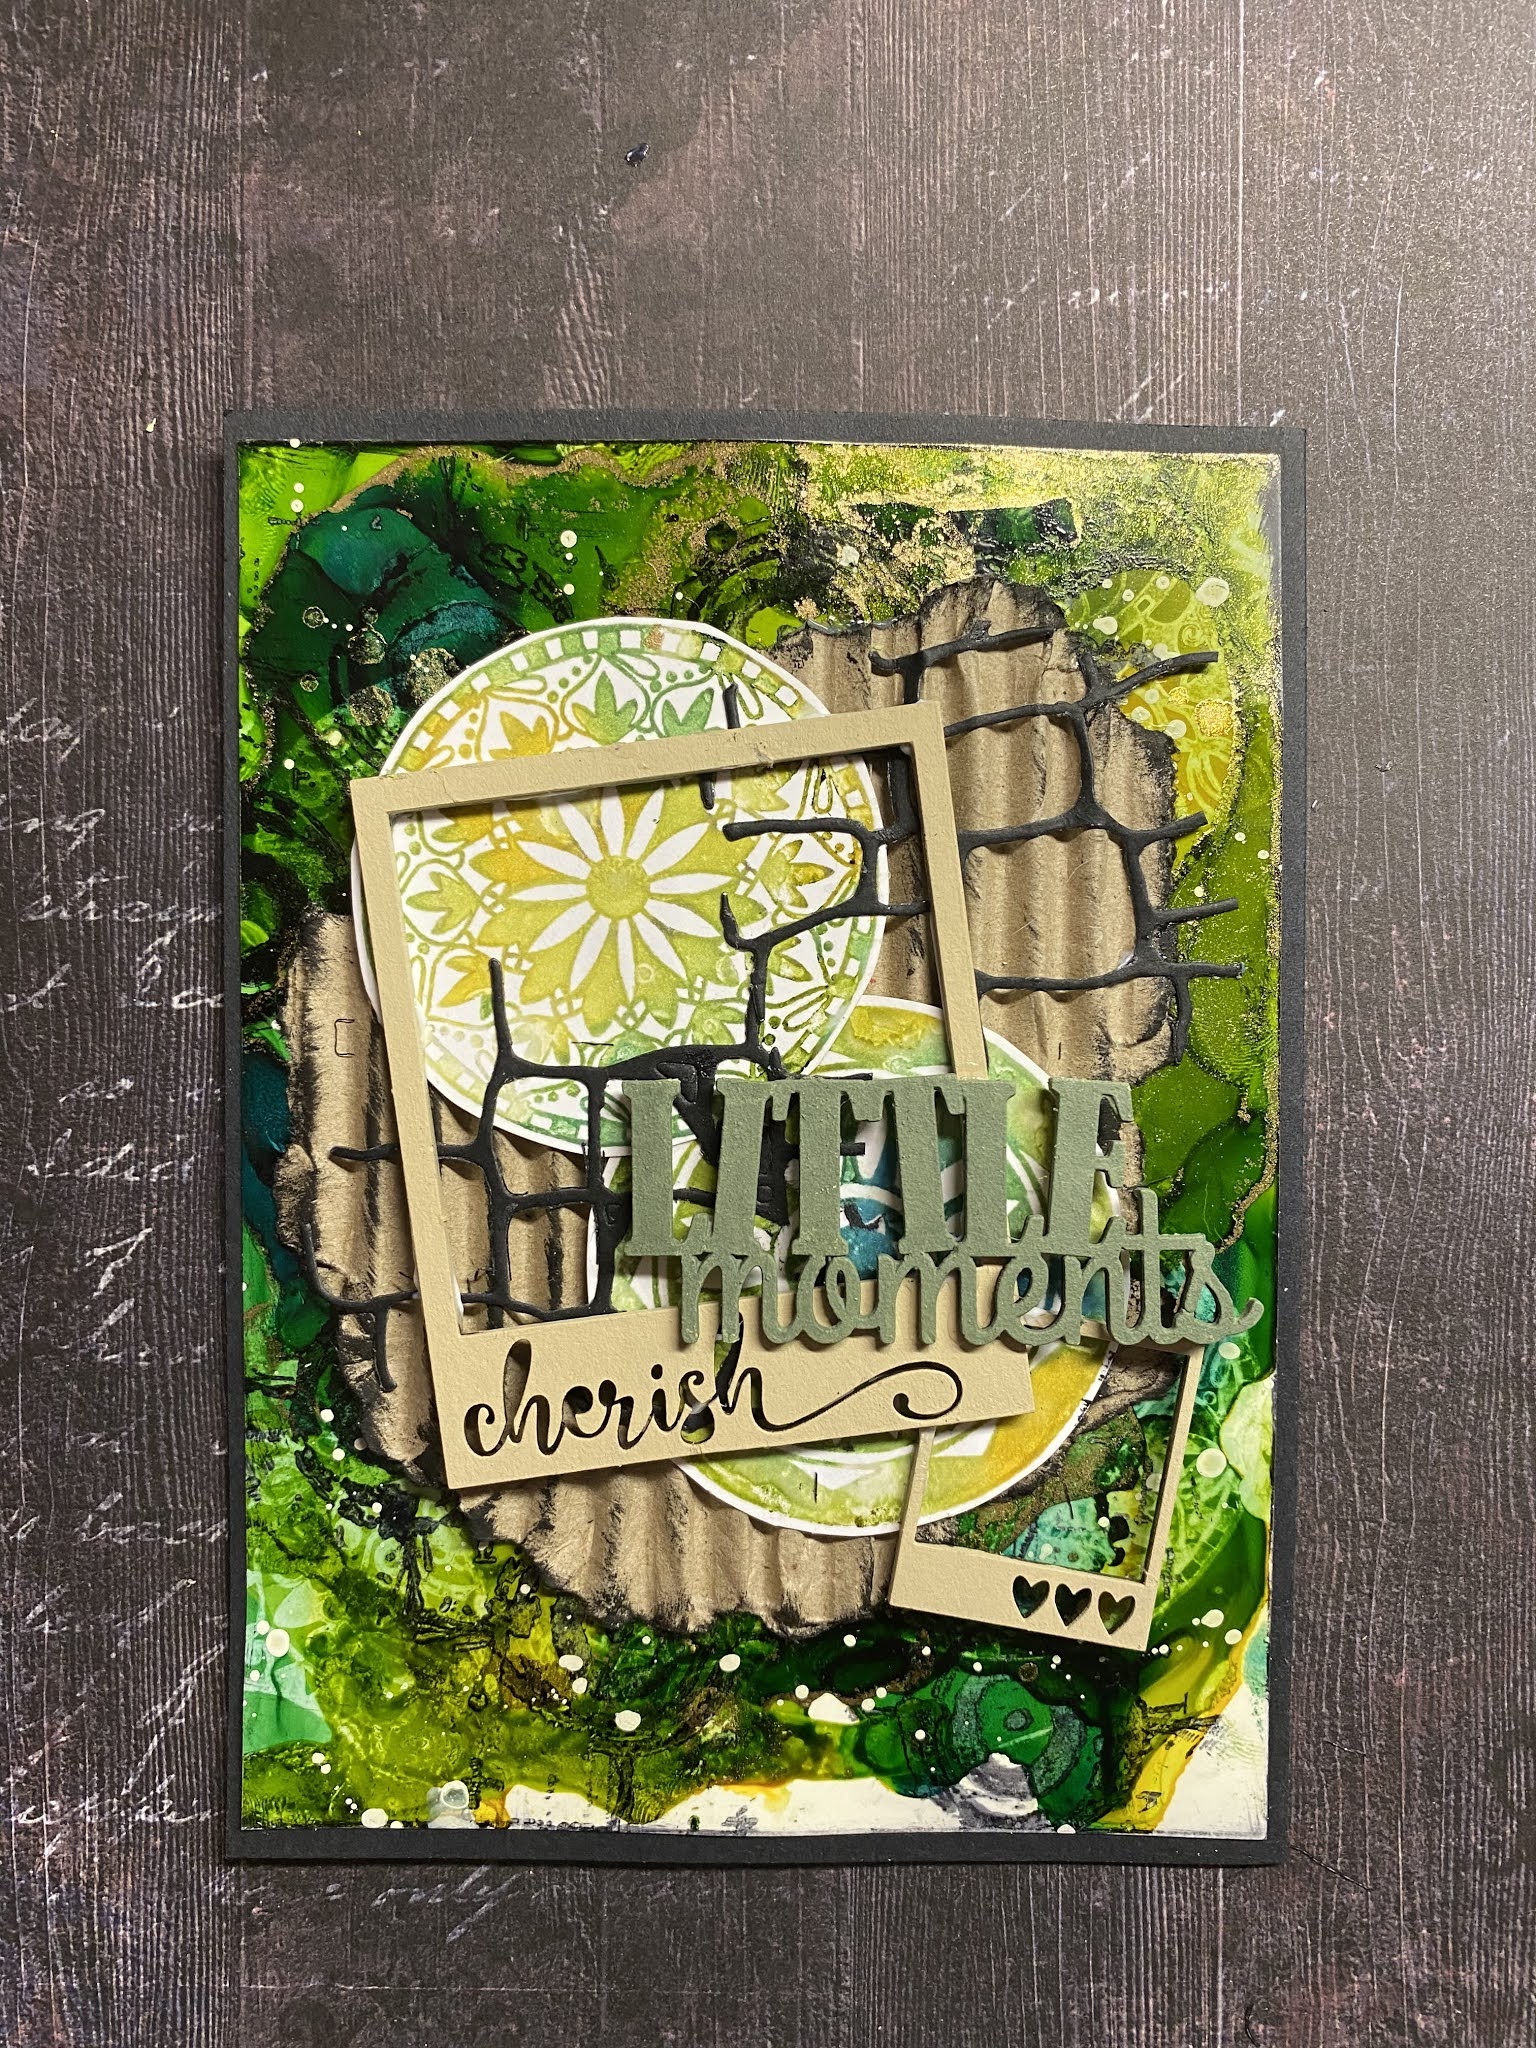
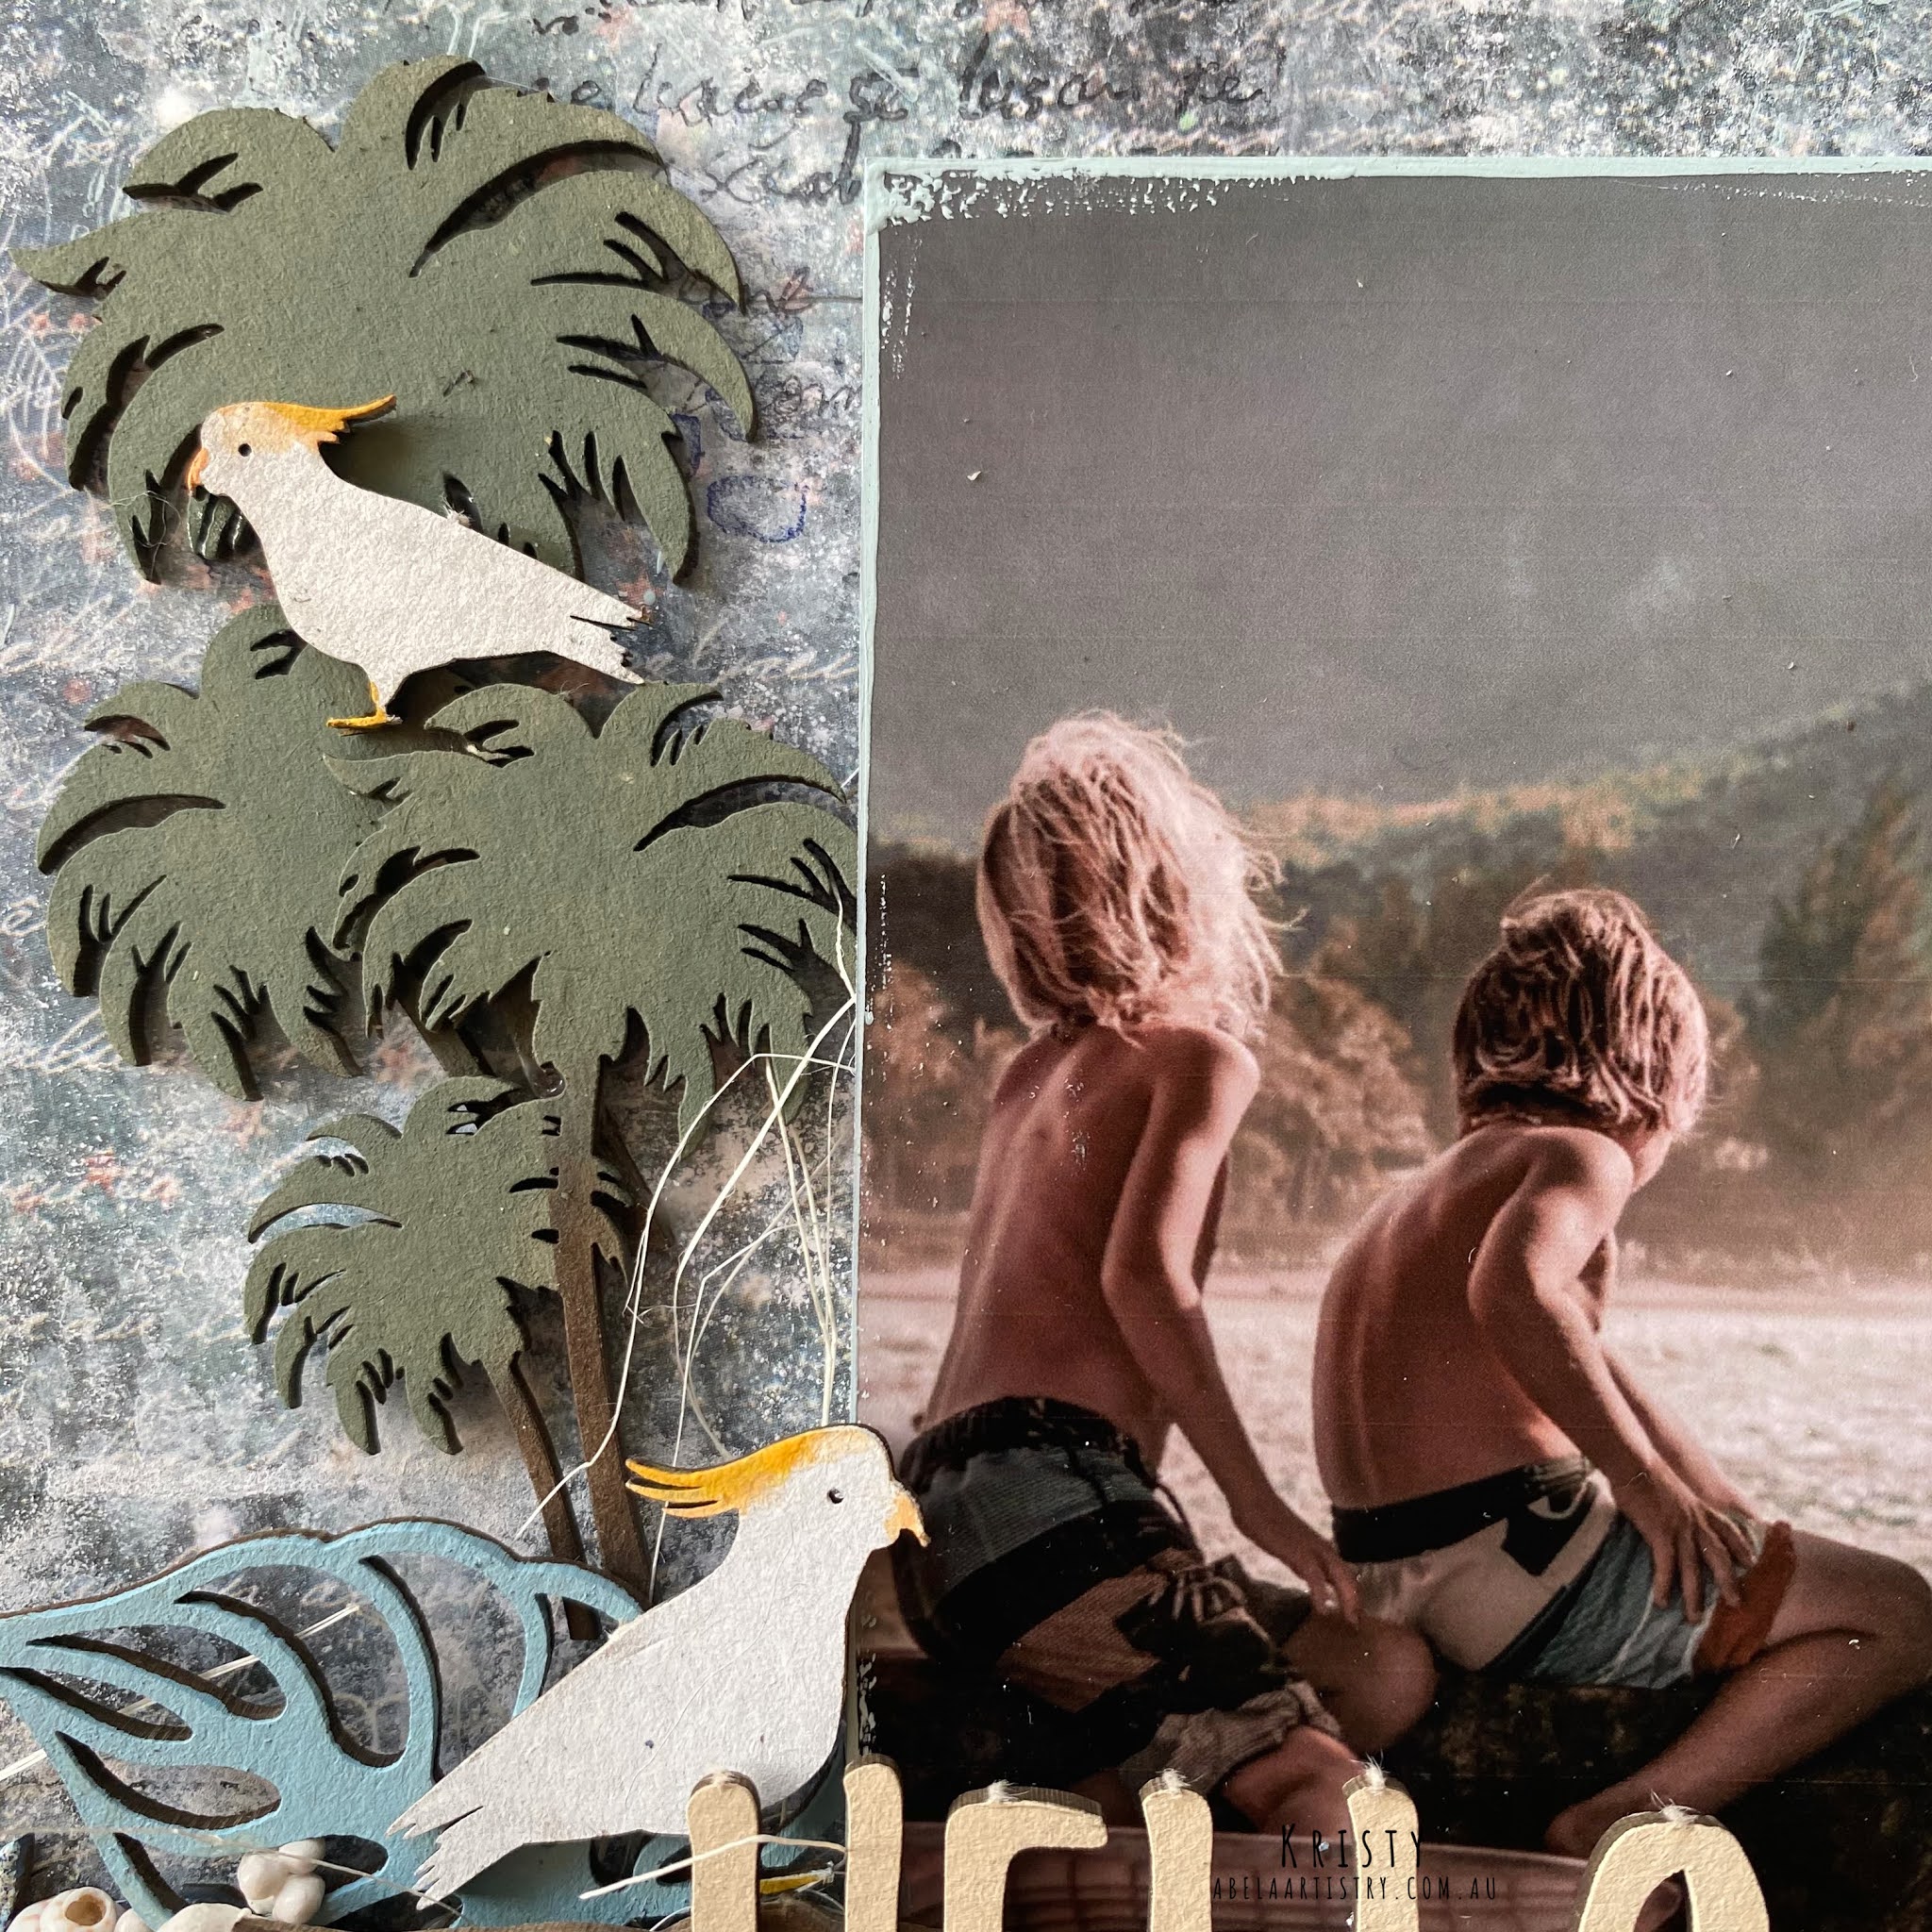
Who doesn't have a picture of that typical 'Dad' moment? What joy our other halves bring! I figured it was time to get some of those off the computer and in the album so the family can see. This was on our way to a NYE Celebration in 2013 so we were both in good spirits and looking to be a little playful... Have a look below to see how I pulled it all together.


I primed the card stock with clear gesso, this one is from 13@rts. I always do this when working with wet medium. Its a fail safe in case I go overboard. If I have a heavy handed moment it can wipe straight off. Yeah for baby wipes!! In order to have the Lindy's spray grip to the page I added some stenciling with modelling paste. This catches the liquid when I am moving the page around to create drips. It also helps to catch the shimmer pigment and gives it a great highlight.


  I added some crayons to highlight areas in the background. I have water soluble crayons in many different brands. To be honest, they are all similar in colour but so different in practice. Without naming names, some are softer and easy to blend with water, others are harder and work more like pencils and leave shadows. In the background here I used Gelato's


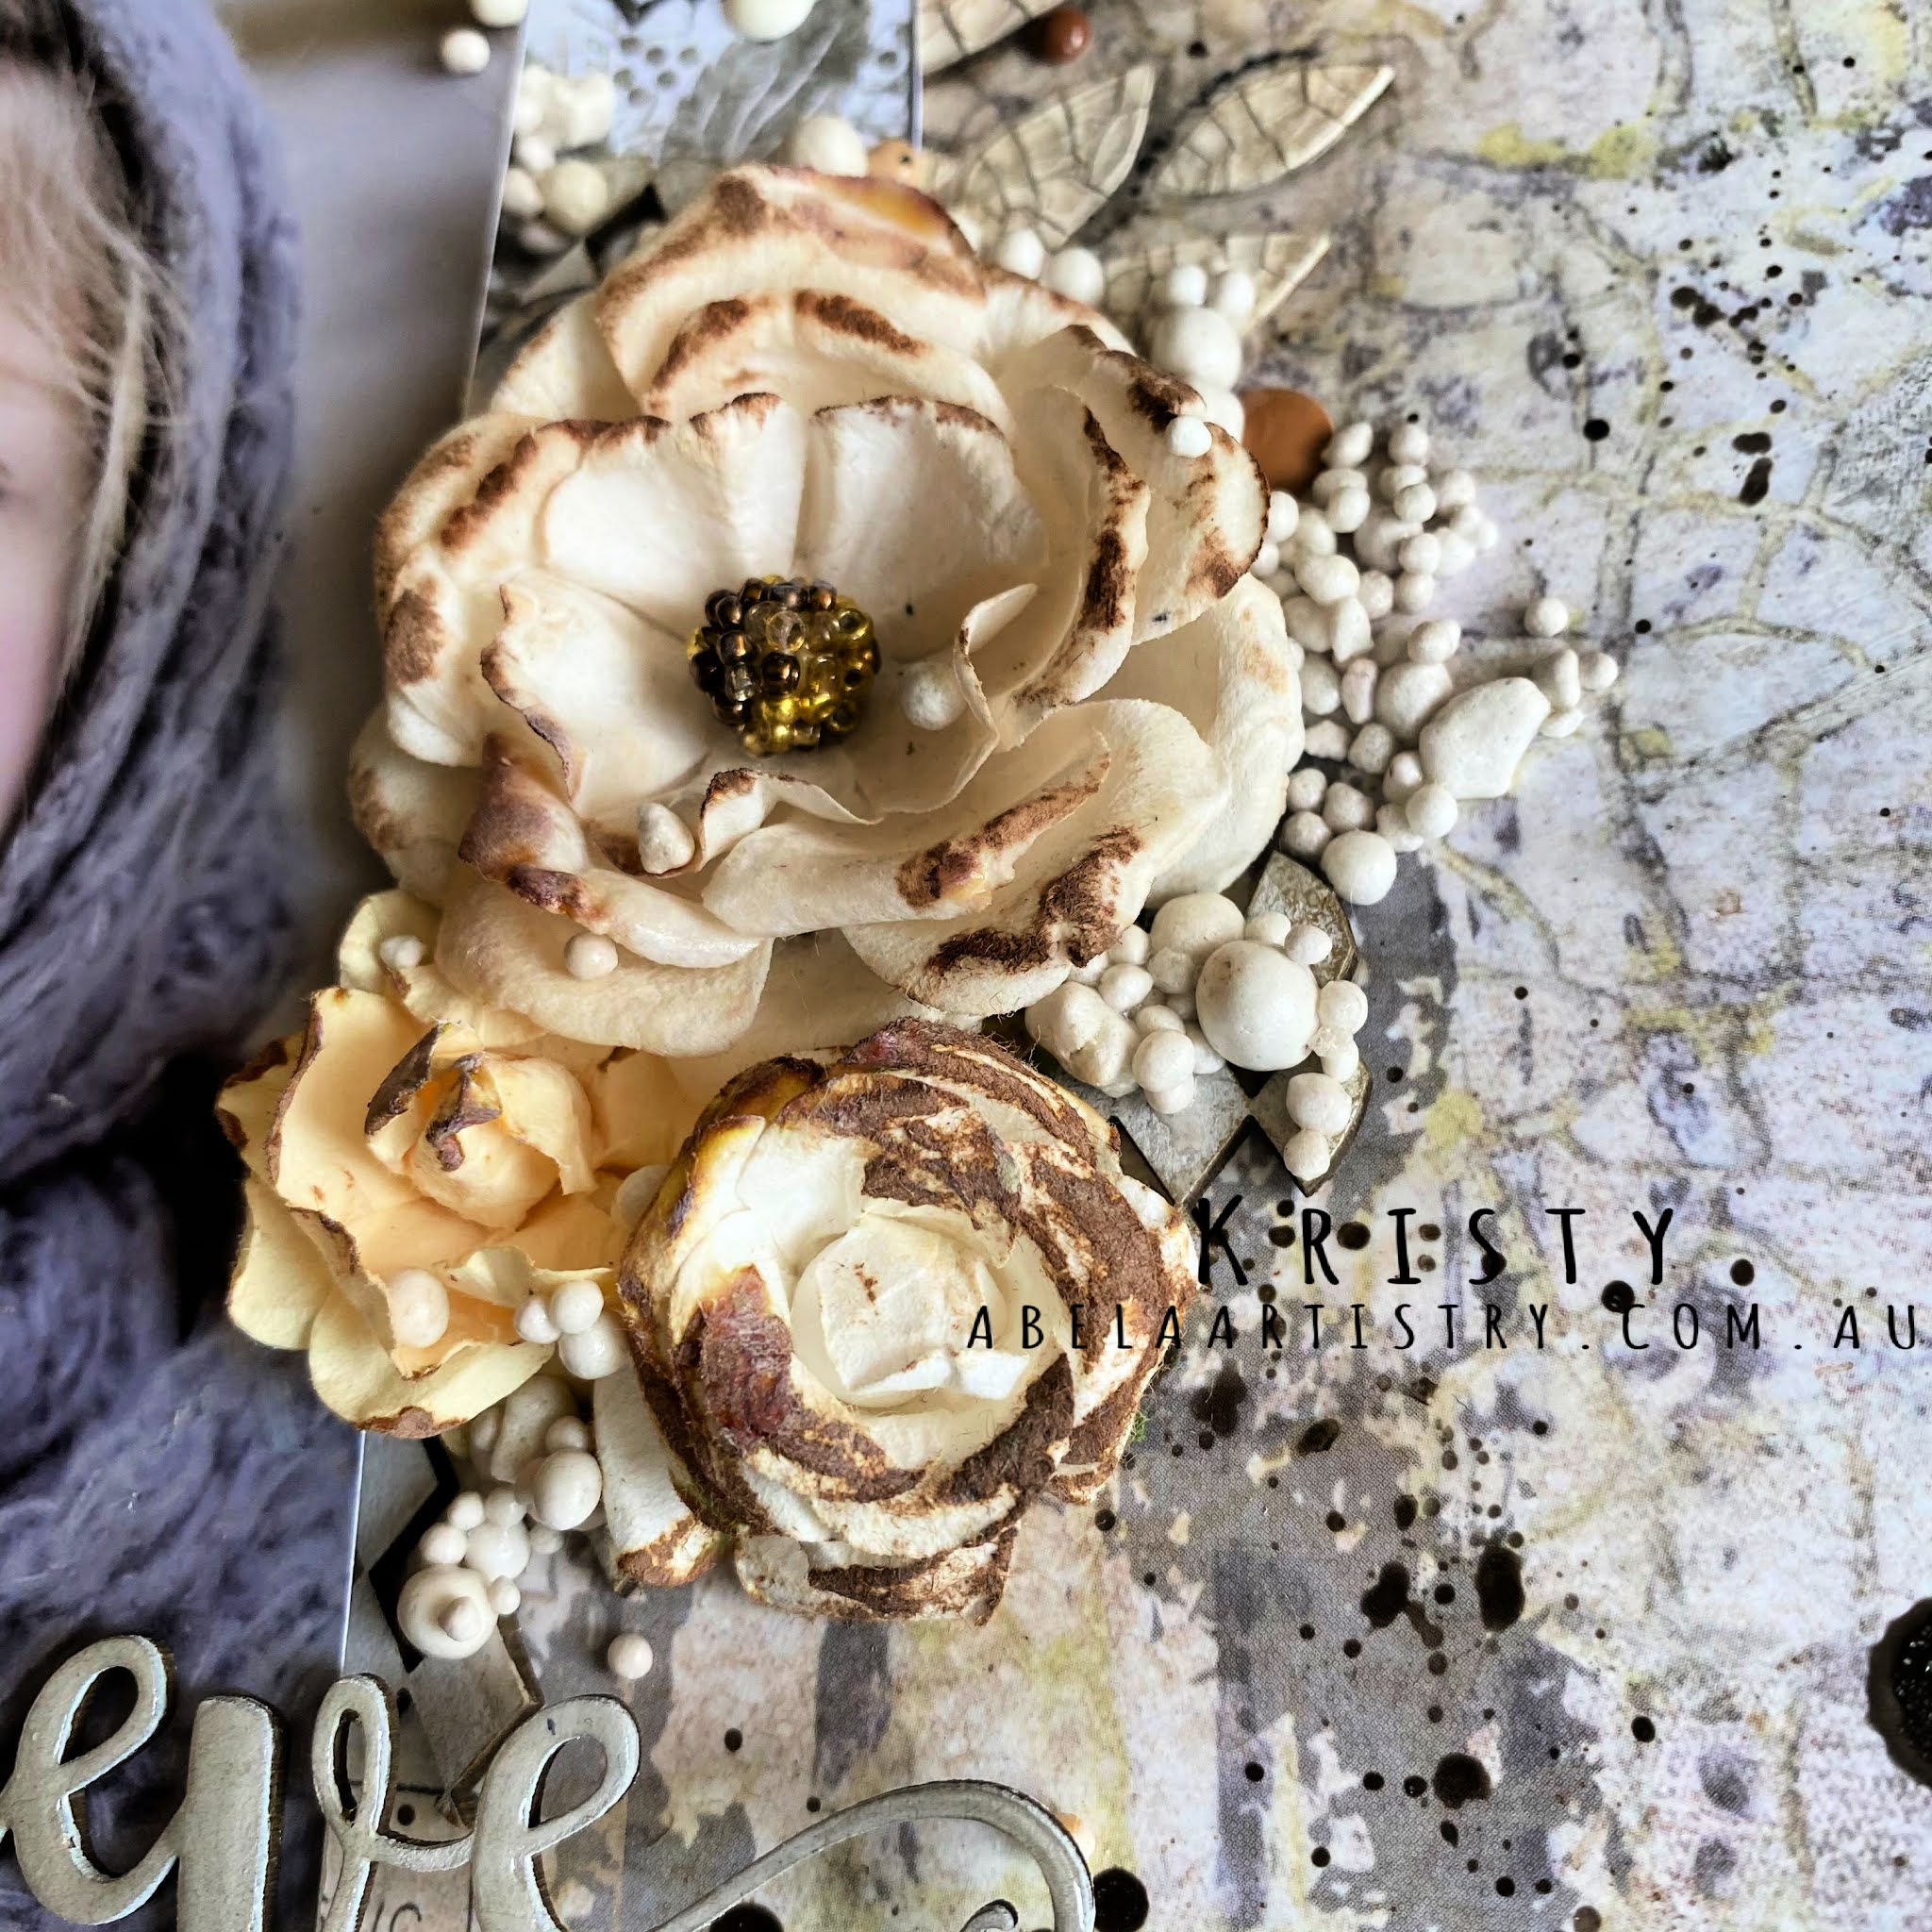
I spent some time fussy cutting the flowers off another sheet of 13@rts cardstock and used some Prima Crayons to colour in the flowers. I love these because they are super soluble and totally disappear when activated without leaving lines. Once dry I went back in with the same colour crayon and added some contrast.

I created matts for my photos... I haven't done this for a while but I really enjoy torn edges and staining them with ink. I think it gives a real randomness to the distressed edge and I find inking them with an ink pad leaves too much white. I used the same spray that I used in the background to tie the foreground.

I decided to go with using black chipboard on this layout. I used a pallet knife to spread the paint on the skeleton clock. It applies patchy and adds to the distressed look. Once I ran out of paint I could pick up on my brush I picked up my mat and rubbed it straight onto the clock to use up the remainder.


I used some Prima waxes to highlight the chipboard so it wasn't flat black. Everyone loves a bit of shimmer right?

I used a dry brush to add some contrast to the arrows as they seemed to get lost on the page.


Thanks for looking, I hope you got inspired to try something new! 

Abela Artistry

Chipboard used.  

Arrow borders #3

Skeleton Clock Faces

Roman Numerals

Blueprint Word pack

Mini words #3 

Key to my heart 

Nuts & Bolts 

Cog cluster

Mini Cogs


Friday, 23 October 2020

Dusty Attic inspiration October 2020 - Alcohol ink cards

 Hey there Fanattics!

Nothing beats the excitement of getting new mediums and testing their limits... but what then? This month I wanted to show you how to use up some of those "experiments" with your products and turn them into easy and interesting cards with our favourite chip boards. As an avid art journaller... yep,  pages and pages of play, some great and some I would rather forget (those become collage papers...) but that's another story! 


I created these backgrounds out of Alcohol ink and a Lift Off stamp pad. The aim was to use the stamping as coordinating embellishments. I find Alcohol ink an unforgiving medium to work with but when you get it right the effects are well worth the effort. Dusty Attics corrugated card stock is a perfect matt for me. It has texture and only needs a little highlighting with a stamp pad to create some amazing effects.  

 
I didn't want to cover up the stamped images and the Polaroid Frame along with the baby polaroid was perfect to draw the eye and the frame quote was a perfect compliment to the Mini Caption. Now we Cherish little memories...
 

I had added some splatters to the Alcohol ink background and added some to the foreground as well. This helps to integrate all the elements into one as well as to reinforce the "unisex" possibilities of the card.
 
 Here I repeated the process. I used some texture & script stamping on the background and coloured my chipboard to match this one. I coloured my chipboard to contrast in the previous card.


Here is the final product! Check out the chip board I used below.


Chipboard


 Dusty Attic Chipboard

 Polaroid frame set #1

Corrugated Cardstock

Mini Captions #6

Squiggly frame #5

Mini Brackets


Hello Summer

 Hi Dusty Attic lovers.... 

 
I was lucky enough to live beside the beach for six years and one of the things I noticed was the grommets hanging down by the river rather than in the surf late in the day. On the East Coast the beach often gets 'blown out' in the afternoon and the surf can be hit n miss. This pic reminded me of the carefree days of evening walks with my boys along th V-wall who thought everything that came out of the ocean was a treasure; and for their Mum, the Cancerian Crab, who believes that the ocean is far more magical at night than the day.


To create this bit of magic I added a spattering of stars in Gold Paste and used a brayer to calm the middle of the page. I didn't want the darkness to dominate . See the pencil mark, that was to act as a guide for my image.

 
I added some script stamping to put back into the background what the gesso had taken out and used a texture stamp in a light blue to add some interest.

 
I coloured my chipboard with chalk paint and added some embossing powder to my nets in places to add a weathered look. For my Gecko's I painted them with a thick coat of paint and then used my heat tool to make them bubble and let them cool. This adds a great textured look, perfect for reptiles. 
 
 
Once I was happy I put all my elements together. Have a look at these close ups for the full effect. 


Thanks for stopping by to have a look and I hope you get to find a little moonlight magic at the beach.


Here is a list with links to the chipboard I used on the layout to help inspire you. 
Till next time... Hugz from me!
 

Wednesday, 30 September 2020

Dusty Attic Art Journal inspiration for September 2020

Hey Dusty Attic Fans, 

I took to the craft room for an art journal session and my chip boards. Why use chip boards? Why not! By the time I build up all the texture in my page and my layers I love having a focal point that pops, literally!

 
 I recently did a class that featured tags and had forgotten just how well the old scrappers tool can compliment a good ole art journal page.  Here I have added an enamel embossed mini word to my tag to compliment the stamped word. 

In the background I started with layers my favourite chalk based paints with a brayer. I then used an old store card to create some vertical and horizontal lines. Along those lines I used a fine tip applicator with white acrylic to add some random scribble text. 

I used some gel prints I made during a play session on tissue paper. Tissue paper is AMAZING. I use matt gel medium underneath and then place the tissue on top. It becomes completely transparent when you add a top layer of gel medium. Works as a substitute for stamping or stenciling on your journal pages when trying to 'flatten' the layers. 

I used some scraps that were lying around on my desk. I always keep offcuts when I create. When paper is already torn it takes some of the thinking out of what to create with and becomes more of a puzzle.. Like "Where does this go?" rather than "How does this go with..."

 
Thanks for looking and I hope that you have been inspired to try a few new things and use our favourite Dusty Attic Chipboards as the focal point. For other art journal ideas check out out my blog at Abela Artistry


 Chipboard used


Saturday, 26 September 2020

Believe - Dusty Attic Moodboard Challenge September 2020

         Hey, Hey! Welcome to another month of challenges! I was so excited to tackle this one, I am a neutral girl through and through and I struggle with 'pop's of colour. So I knew that this one was going to be FUN!


I scoured my stash to find some foliage to compliment the mood board. Dusty attic have an epic range of leaves & foliage so I'm sure you will find some to suit you. As always I lay out my elements and try to visualise where the layout will go.

 
After applying clear gesso on the background I used a 12 x 12 Stencil of a tree and white crackle paste. I wanted to fade out some of the background and emphasise the tree. 

 
After applying some water colour to the background with Sprays I used a wipe to remove the colour from the paste and leave it in the cracks. I added some definition with a water colour pencil and then spritzed it to soften the edges.

 
I did have to wait for this one to dry overnight... Wink. Once that was done I tried something a little different... I used washi tape to attach my fabric to the layout. Like with my other project this month I dipped into my old scrapbooking stash and pulled out a few forgotten gems.

Next I covered my Broken Bits with white gesso and my title 'Believe'. I applied some cappuccino paint to the foliage and rubbed a little gold wax on the tips to add a bit of a highlight.


I stuck down the tags, added some fibres and then positioned my photo and arranged the Broken Bits to frame where it was going to be mounted.

I stuck down my foliage and decided I wanted to highlight it a touch. I added some glitter with glossy accents to the berries on the branch.

 
I added some flowers, cabochons and art stones to finish off along with another Scrappers favourite... Enamel dots. It was great to get some extra uses for what I used to just use on a traditional page in my mixed media.

 
I used my distress inkpad to add some highlights to my flowers. I am a super messy scrapper and I  lightly rubbed the pad direct to the flower. I like that it is irregular and I never know how it will turn out.


Thanks for looking and don't forget to pop your entries in to win.